Showing posts with label spreads and saucy bizzness. Show all posts

20150810

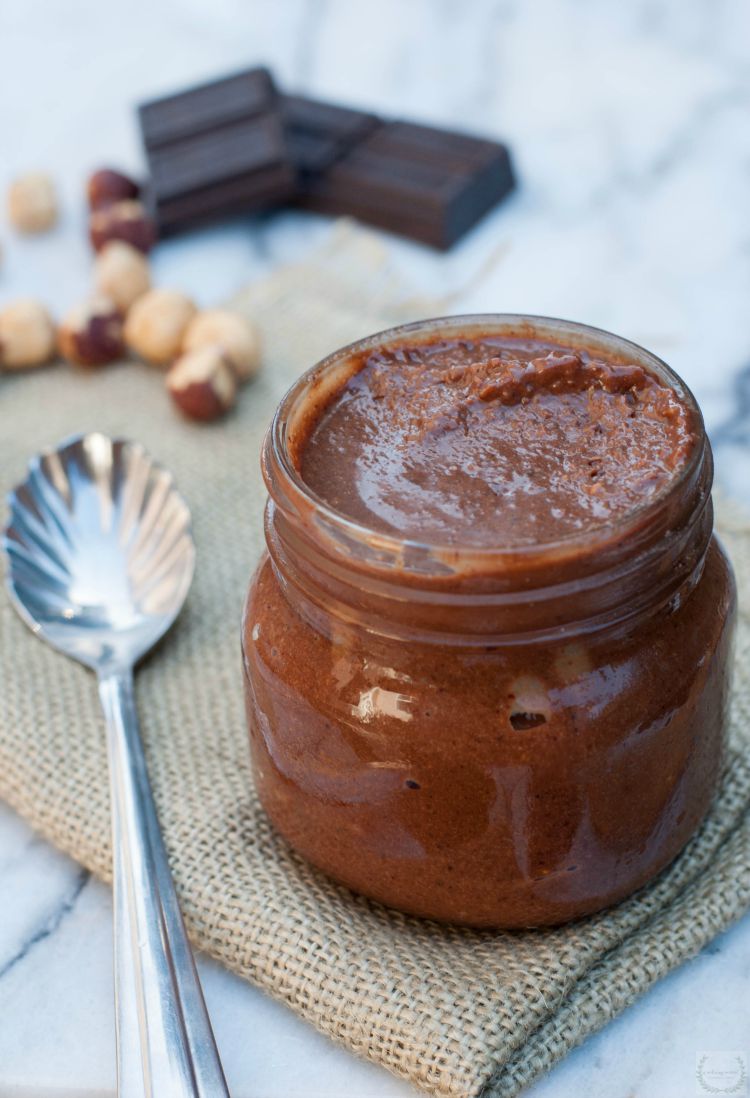
Chocolate Hazelnut Spread || Part Deux

Remember that one time I made some dairy free chocolate hazelnut spread, then made that crazy time consuming nutella crepe cake?!

How could you forget right. 
Well, you could probably forget quite easily because you weren't the one who spent a hundred years flipping crepes. 
But I will never forget.

20130619

Strawberry Jam {forever}


When I say strawberry jam, it comes out to the tune of "Strawberry Fields Forever" I just can't help it. The Beatles possess my mind.

Now your thinking it that way aren't you.


For the bridal shower I hosted last week, {which I am completely overwhelmed with the amount of interest in, Thank you so much people of the internet! I love you!} I gave strawberry jam as favors to my lovely guests.

In this post, I will show you how I made the jam, and how I decorated them. 
They were super cute.


Especially when they were all lined up ^^^like so.
I love things all lined up. I really do.


This was actually my first time making jam. Growing up, my mother made various types of jams; but I had yet to participate in such activity. 
Armed with a couple flats of overripe strawberries, several boxes of jars, pounds of sugar and my mamma at my side; the adventure began.


Shopping List for this project:

canning jars, with sealable lids
overripe strawberries, tops removed
granulated sugar
Sure-Jell Pectin

The jars I bought were half-pints from Wal-Mart, made by their own MainStays brand.
I decided on these jars, because first of all they were cheaper; but also because I am not particularly fond of that quilt print on the other jars of that size. 
If you want to make less jam though, get the Kerr jelly jars; which are like 4oz's or something.


To see the instructions, and correct measurements; go to Sure-Jells site right here.

But here is the basic rundown:


Core out all the strawberries, and either mash with potato masher or lightly pulse in food processor. (don't puree it!)


Measure it out into a large measuring bowl. 
In case you were wondering, I did not suddenly get married. That is my madres beautiful hand.

Pour berries into saucepan, and pour in pectin. Bring to a rolling boil, pour in sugar, bring back to a boil  and pour into jars. 
Voila! 
You have jam!


Boil in a canner, then lay those hot-potaut jars out to cool.

In a row. because things in rows are cool, remember.


That one jar needs to move a little more to the left. You have no idea how much its bothering me right now.
OCD much?

Anyway...
Repeat this process several times, until you have all your jars filled and strawberries gone. I think we ended up doing like five or six batches to fill about forty jars. (each batch filled seven half-pint jars)

So let them all cool down completely, stare at the beauty of them for awhile; then its time to decorate.


To make these little jimmer-jammers super cute, I stuck on a label sticker, covered them in fabric, tied them with twine, and attached a tag.

The labels were super simple, and just stated the type of jam and the date it was made. I apparently did not take a photo of that, but here is the jpg of it:


To cover the ugly gold jar lids, I used a floral fabric to match the rose theme, and cut them into circles. I believe they ended up as a four and half or so circle. (I just cut a demo with paper around the jar, until I found a size I liked.) To keep them from raveling, I cut the circles out with pinking shears.

The pink floral fabric came as two fat quarters, which I found and fell in love with--but it was not enough to cover all forty jars, so I found the white fabric which is pretty similar. Each half yard made twenty circles.


The most difficult part of this whole shebang honestly, was tying the fabric onto the jars.
Silly, I know.
But it was some tough stuff.
I ended up putting a rubber band around the fabric, then tying the twine over it. It worked pretty well, when the rubber band wasn't flying off into my face. 
Battle wounds, ya know.

The mini spoons, as I mentioned before are from Ivana's Gifts N' things on Etsy. The owner of the shop is so sweet, and the price was amazing. I will definitely be buying from her shop again, in the future.

Fun Fact: I can never spell definitely. I have to look it up every time. Its weird, really.

The tags, my sister whipped up and printed out on butcher paper; to give it a little bit of a rustic feel.
They say "spread a little love" and the name of the bride and groom on the bottom. The tags are two and a half inches tall, and fit the jars perfectly.


So my friends, that is that.

I will continue to post some more tidbits about the partay, as the week progresses.

Again, thank you so much for the love and support! I really am so overwhelmed with the amount of visits to my site, concerning this party.

Its really giving me an itch for another one. Party fever they call it.

To see more of my party inspirations, and a bunch of other stuff...follow me on thee Pinterest.

As always....Enjoy!


20130503

Roasted Red Pepper Quinoa with Roasted Tomatoes


Quinoa guys.

I love it. Nobody else seems to.
Why?
I don't get it.
Because its bland, they say. There is no flavor to it, they tell me.
Do you eat pasta all by its lonesome? Couscous or Rice?
I don't think so.


If you need some convincing on quinoa. I have the dish for you.
Its full of flavor, so don't even say its not.


Why is this quinoa so full of flavor.
(I keep feeling the urge to say "flavor-town" name where thats from!)

Roasted red stuff. Thats why.

Its so simple to make this quinoa dish, and its sauce.

Its super saucy.

Here are the secret ingredients:


Thing 1, 


Thing 2.

Know what they are? Can you tell from these awful, low lit photos?

Roasted red peppers, and roasted cherry tomatoes.
Roasted tomatoes with garlic are my new best friends.
I may be eating some right now. You will never know.


Roasted red pepper sauce is also my new friend.

The wonderful Ari at the Diva-Dish made this sauce for a pasta dish a few weeks ago, and I knew I had to make it in some form or another.

You know how much I love me some pesto, in any flavor or form.
This is basically the same recipe as regular pesto, but made with roasted red peppers instead of a basil.


Here's the recipe guys:


To roast the tomatoes:
 Halve 1 cup of cherry tomatoes, and add 2 cloves garlic minced. Toss with olive oil until coated.
Cook on a baking sheet, in a 400 degree oven for about 20 minutes.

To the roast the Red Peppers:
Either cook on baking sheet in 400degree oven about 30 minutes (until soft and charred)
or
Roast over stovetop flame, turning over until each side is charred and softened.
Place in a ziplock bag, while warm, and let it sweat for about fifteen minutes.
for further, step by step direction go to the diva-dish: here.


Enjoy!


20130425

Gluten Free Veggie Pizza with Sausage // The Best Pizza Ever


Remember a few weeks ago on a week in a blink, I mentioned the best pizza I have ever tasted, and promised I would devote a whole blog post to it? (run-on sentence anyone?)

Well my loves, that day has come.

Its time for you to be introduced to the king of pizzas.
A love affair for the veggies eaters and meat lovers alike.
A crust so soft and crisp and perfect, as it should always be-gluten free or not.


This pizza. Oh this pizza. 
I am salivating over just the memory of it.

I'm going to eat it again tomorrow. You can't stop me.


 Why is it so delicious?
Well, first of all, look at it.
Its pretty obvious the amount of deliciousness that is stacked up onto that little crust.

Oh but the crust! 
Thats one of the secrets. 
Its amazing.

Its super easy to make, only needs a half an hour to rise (as opposed to some other brands, that shall not be named, that take an hour or two--and still don't taste as good.) is the perfect texture, delicious taste, and honestly--does not taste gluten free in the slightest.
It tastes like any other gluten filled thin crust pizza.

I'm really excited about it guys. What I'm not excited about: the fact that only one grocery store in town carries it, and sells it for almost ten buckeroos.

No bueno.

It does make two pizzas though....and they are super delicious...if thats any consolation.


Making this pizza is not hard at all.
First off, you just follow the instructions on the pizza mix baggy to make the crust. eee-zeee

Next, make a spinach pesto sauce. You make it the same way as you would my basil pesto, but replace the basil with spinach. I use a spinach pesto instead of basil, so the flavor is a little milder. I did try it with regular basil pesto, and it was good-its just better with spinach :)
I do add a few leaves of basil, or two of these Dorot basil squares. I love those little squares, they make life easier. (you can also use a garlic square in place of a fresh clove for the pesto)

Now that you have a crust, and pesto--smear that sauce on that crust!
Not hard at all.

Now the toppings:
You can add any vegetables you want, in any quantity. Heres what I like on mine, in the order in which they lay:
Peppers and Onions (I use TJ's frozen grilled peppers & onions, but fresh work)
Hot Italian Sausage, pre-cooked (you can use sweet as well, but the spicy kicks it up a notch)
Mushrooms, sliced
Fresh Tomatoes, Sliced
Zucchini, shredded
a little basil to top it off!

Your set! I promise, you wont miss the cheese at all.
This is actually the first pizza I've made, that I didn't miss the cheese on it.
I read somewhere one time that if dairy free, you could use shredded zucchini to replace the texture of cheese on pizza. I don't agree with that statement, it does not resemble cheese in the slightest, but I have been doing it ever since I read that article. Shredding it makes it very non-intrusive of your pizza, no matter what other toppings you have on it.


Dear friends, make this pizza. I dare you, you won't regret it.

I may have to have it tonight, because I'm not sure I can wait until tomorrow.
I just might have to have it tonight and tomorrow. Its that good, I'm telling you!


But even if you don't want to eat this vegtastic, taste popping pizza; do try Gluten Free Mamas pizza crust. It really is the best pizza crust I have found so far.


 Enjoy!

 *this is not a sponsored post. I just happen to really like the products mentioned here today.

Post edit: I did indeed make this for dinner tonight, except with a different pizza crust. ( I had a different brand already in the pantry) It was not nearly as good as last weeks. Its the crust guys, Gluten Free Mamas all the way.

20130424

Gluten free and Dairy free Chocolate Cupcakes with Raspberry Curd


I was looking through all my recipes on here the other day, and realized that I haven't really talked about chocolate cupcakes.
Sure I posted this back in twenty-ten (can you believe this blog has been around for three years already? I can't..but maybe thats because I abandoned blogging for a year or so in that time..)
Anyway, that post. Oh those early posts. I like to think that over the years the content of this little blog of mine has gotten better; especially when I see how awful those earlier days where. 
I  mean really- in your face photos, lots of dairy, gf flour I thought was good at the time, and the ever changing font size ala the fad of 2010.
Classy stuff I tell you.

I should just delete those early days, but it just would feel wrong to do so. Not all babies start out cute, ya know? Things progress, it would be unnatural to pretend they didn't..does that even make any sense to anyone but myself?


But cupcakes...

I now have to perfect cupcake situations. A white cake filled with lemon curd, and a chocolate cake filled with raspberry curd.

Both will soon make appearances at some upcoming events, me thinks.

{I also realize I never shared my lemon curd recipe with you, that will make an appearance soon as well :) }


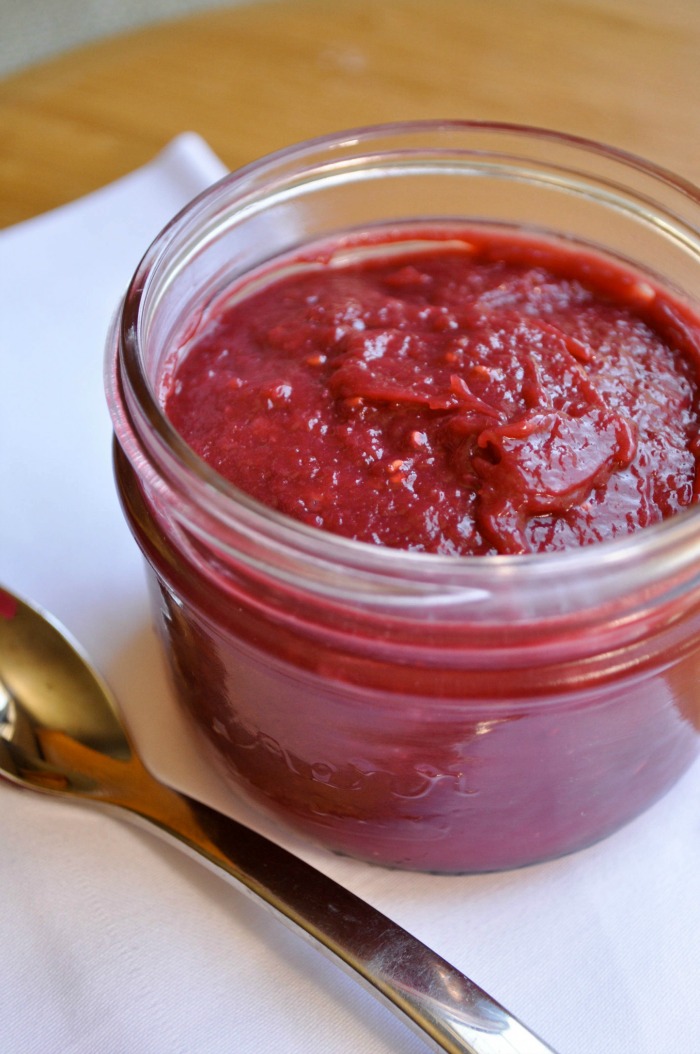
Raspberry curd, is basically the same as lemon curd--except it takes like twice as long. It may just be easier to use raspberry jam. (with the seeds strained out)

Why did it take an hour and a half to make this little jar of sauce, you may ask. 
Seeds. That is why.

Unlike lemons, that you just have to juice, raspberries have to be smashed. Smashed and de-seeded. Its about as fun as it sounds. By that, I mean not at all.

Than if you get impatient, and decide to put half of the raspberries in with seeds-you'll have to spend another forty-five minutes straining out seeds at the end.
ugg. 

Worth it though.


You want to make it the day before you need to fill your cupcakes, so that it will firm up in the fridge over night. Also, try to limit the amount of times you take a spoonful to your mouth.

I also went ahead and made the cupcakes the day before use, so that they would be all ready for finishing touches in the morning. In the morning, when I would be visiting one of my longest friends brand new baby girl, and bringing some treats with me. My mother taught me to never make a house visit empty handed, so I don't. Actually now that I say that, I'm not sure if she taught me to, or thats one of those things I tell myself I need to do... 
I also, listen to this, used these same cupcakes for two other things.
The recipe made 26 regular size cupcakes, and 10 mini. Four to new momma, 20 to my momma (to bring for one of her students b-days) and 1 regular, and 9 minis to my sunday school class. The three year old-turning four year old requested chocolate cupcakes with pink frosting and sparkles for her birthday. So thats how all this began in the first place. (she got the big one to take home, the rest of the kids ate the mini ones in class)
If you know your math, you'll notice that that leaves 1 big cupcake, and 1 little one unaccounted for. I can tell you, I ate the mini one (I had to make sure it was edible, it would be wrong if I didn't, right) the regular sized one was eaten by someone else in the house. Because sharing is caring.


(recipes at the end of the post)


Now that you have your fresh raspberry curd, and cooled cakes its time to fill 'em up, and make them pretty!


Get your cake, and either a cupcake corer, or an apple corer (honestly, they work the exact same) and drill a whole smack in the middle.
like so:


Now this next step is very important.
Take that little middle, smear it with raspberry curd, and stuff it in your mouth. 
It is absolutely crucial that you don't forget this step.

Unless you want to pretend that the whole never happened, and filling miraculously appeared in the middle--don't eat it. Cut it in half, and save to put on top of the filling. (you want to replace the piece with the top of the cake, back in its place)


You got your wholes, just go on and fill them up with curd.
for some reason that last sentence does not sound so appetizing...


Next, frosting!


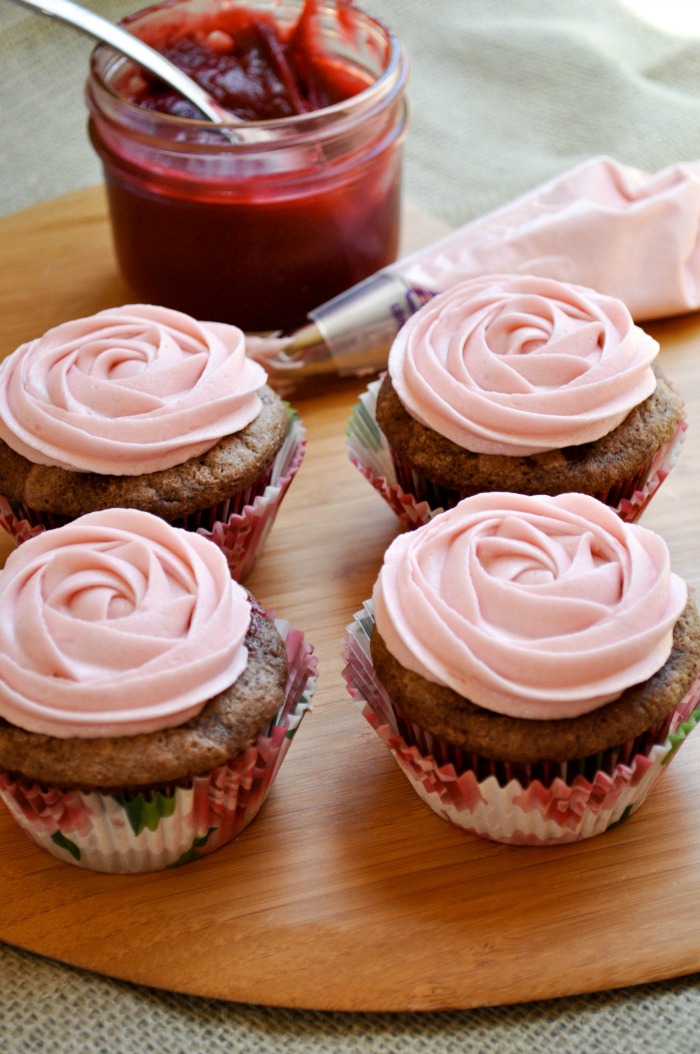
Because the cupcakes I was making where going to celebrate a new baby girl, and a birthday girl-I chose to frost with pink rosettes. Similar to what I did for my birthday cake, but it worked out a lot better ;)
The secret: a bigger tip.


To make the rosettes, you use the biggest star tip you can find. I have three sizes, a small, medium and large. The large was used.
Frosting the rosettes is actually really easy: you just do it from the inside out, as opposed to the outside in you would use for a regular star frosted cupcake.

You start with a little dollop in the middle, and stretch it around and around until your cupcake is covered.

I wish I was talented enough to photograph myself while doing it, but alas I am not...
so here is a helpful video someone else did :)


For the min cupcakes, I did not fill them, and I used the medium sized star tip. They look a little sad because I decided to only frost the ones I needed to deliver, put the remaining frosting in the fridge and left to snuggled a baby for a couple hours. When I came back, and was ready to frost my little guys, the frosting was rock solid. Once it was soft enough to use, I frosted them; but the frosting was a little runny. Luckily they are only for three year olds.


Here are the recipes guys:


For the cake, I use Bakers German Chocolate cake recipe.
 Here are the ingredients I used, click on the link for complete recipe!

1 package BAKERS German Sweet Chocolate
1/2 cup water
4 eggs, seperated
2 Cups GF flour ( I use King Arthurs GF Flour or Trader Joe's GF Blend)
2 tsp Xanthan Gum
1 tsp Baking Soda
1/4 tsp Salt
1 Cup Dairy free Butter
2 Cups Sugar
1 tsp vanilla
1 cup Buttermilk (to make: 1 cup dairy free Milk (almond for me) plus 2 tsp apple cider vinegar, or lemon juice. Let sit for 10 minutes, then ready to use!)


Wow that was a long post. 
Thanks for tuning in and reading everyday guys, your the best!


Enjoy!!


20130418

Gluten and Dairy free Eggs Benedict


So I made english muffins. Besides eating half of them fresh from the oven, smeared with butter (of the dairy free variety, of course!) there is only one thing to do with them.

Eggs Benedict.
When you have english muffins, fancy brown eggs, and canadian bacon lying around, it must be made into a benedict of an egg.

As I'm trying to write this. I have been sneezing non stop for the last five minutes. Allergy season, please be over already. I'll trade you my first born child, to never have a sneezy, itchy, swollen facial situation again. You can take the food allergies too, that sounds like an even trade.

Anyway, back to the eggs benedict:

You start by toasting up some canadian bacon and english muffin halves. Muffin topped with butter, both cooked on a baking sheet until lightly browned. I think I turned the oven to like 375 or something, but it doesn't really matter, as long as they aren't burnt or raw. (you can use the broiler also, just keep a close eye out!)

Next you poach an egg. 
(or two-technically eggs benedict should be both halves of the muffin topped with treasures.)

Now I don't want to start an uproar or make anyone feel all depressed about themselves or anything, but I'm kind of a super awesome egg poacher.
Don't feel bad that you aren't as awesome as me at it.
Its just a special talent I possess. 
You know another incredibly useless special talent I have in my life? I can totally predict when people are preggo. I don't know why, but I've always been able to tell way before the news is shared. Halle Berry? Totally predicted it at the Oscars. I had witnesses, and I was right. So watch out ladies I don't know (this power usually works best with people I see often, but am not too familiar with.) if your hiding a bun in your oven right now, I'll know. There are actually a few of you out in the blogosphere I have my thoughts about....

But again, back to the eggs bendicto. (thats me talking in an accent. if you can't tell.)
I rock at making this dish.
The only time I do not rock at poaching eggs for said eggs benedict, is when I decide to abandon that poor little egg while I go butter up another muffin. and no thats not a euphemism, I was actually buttering a muffin. Of the English variety. (still not a euphemism!)

How do I make such fabulous poached eggs, you may ask?
By using to special tricks. You can just use one or the other, but making decisions is not one of my talents-so i use both.
Trick one is to add a little vinegar to your water. You fill up a pot with an inch or two of water, then you add a teaspoon or two of white vinegar. Easy right? The vinegar helps the eggs to coagulate to itself without seperating.
Trick two is to make a hurricane in your pot. Add the same amount of water as trick one, and after its boiled stir it all around quickly until a little hurricane of water forms in the middle. Plop the egg right into the hurricane, and it will spin around itself to prevent separating.

Use one or both of these tricks, and you too will impress the world with your egg poaching skills.


So you got your eggs, bacon and bread. Like so^^

Next you want to make a Hollandaise sauce. You want to make the sauce last, because it will started to harden and curdle as it cools. Thats why in these pictures its a little clumpy, it wanted to be eaten right away.

Making Hollandaise sauce dairy free, uses the same concept-but it will turn out a little different. It won't be quite as creamy, and depending on what type of non-dairy butter you use it may be a different color. I used Nucoa buttery sticks, and thats why the sauce is so bright and yellow.

Heres how you make it, using a blender method:

you need: 2 sticks of butter
        3 egg yolks
                juice of 1 lemon
                       1 tsp cayenne pepper

Start by melting the butter in a sauce pan (microwave works fine, too)
Pour the egg yolks into a blender, and mix on low speed just until combined. Next, pour the melted butter in a very thin stream while the blender is going (on low still) and until the butter is all combined.
While its still going, add in you lemon juice. If it appears thick, add a little more lemon juice and continue to blend. Add in the cayenne pepper, to your liking, and serve right away.


Pour the sauce on top of your egg, bacon, and bread.
Its ready for eating!

But wait, it looks a little bland. and there are no vegetables involved.
A little spinach on top...


Ahhhh, much better.
(you can replace the bacon with spinach to make eggs florentine. As this has both spinach and canadian bacon, we shall call it eggs benetine. floredict? whatever.)


Enjoy!


Remember to follow along---buttons for pinterest, instagram, bloglovin, and rss email subscriptions on the side bar >>>>


20130318

Gluten Free Reuben Sandwich


Its now the day after St/ Patricks day. You have half a corned beef brisket left over. What are you to do?
Make a Reuben sandwich!


Obviously, you can't make a real, rye bread and swiss cheese sandwich, but you can still have a reubanesque concoction that will satisfy your craving and use up your leftovers.

To start, you need to slice up your beef real thin.
Like so:


Next you'll butter up the outsides of some bread, and sauce up the inside: homemade thousand island dressing on one side, dairy free cheese on the other. ( I used goat cheese chevre, but any kind of cheese alternative you like will work) Add the beef slices, and some sauerkraut. 
Place entire concoction on a griddle (med heat) and warm until cheese is melted, and beef is warmed.
Thats it! Now its time to eat it up!


Shopping list for sandwich:
1 loaf Udi's french loaf, or any gluten free bread of choice.
sliced corned beef
dairy free cheese
gluten free Sauerkraut
Thousand Island dressing
dairy free butter

Layer ingredients and serve!

Thousand Island Recipe:
1 cup Mayonaise ( I use soy-free Vegenaise)
4 Tblsp Ketchup (get corn syrup free!)
2 Tblsp White Vinegar
1 Tblsp  Sugar
1 Tblsp  Sweet Pickle Relish (get corn syrup free!)
1/4 tsp Onion Powder 
1/4 tsp salt
1/8 tsp  black pepper

Combine all the ingredients in a bowl and mix. Allow to settle in the refrigerator for at least an hour, before use.


Recipe makes a little over 1 cup.

*I made this recipe in half, as I will not use this dressing for any other purpose after this sandwich.


Enjoy!